In Audio Techniques III (aka A202), we cover everything from ProTools automation and mixing in 5.1 and 7.1 to using WaveLab for mastering tracks and assembling a CD master. Much of the latter half of our semester centered on gaining the skills necessary to wield various flavors of compression and equalization (in both L/R stereo and mid-side varieties) to bring a track into its final form. Throughout this section, we learned what types of compression should be used where, track sequencing, types of listening (micro, macro, and holistic), and more.
For me, this class really felt like the first dive into actually hearing dynamics and equalization processing. Before this class, unlike many of my other classmates, I really hadn’t ever mixed anything. I never really wrote or recorded music that needed “production” and therefore entered this program having no clue what a compressor did, let alone how to use it. While EQ, compression, and time based effects were covered in a previous course (A201), I still didn’t really feel like I had the facility to get what I wanted out of the sound. However, having gone through this course, I now have an excellent start into truly using these tools to bring a track together.
For our final project, we were tasked with mastering 5 songs using the techniques we learned in class and delivering them in both a DDP format and as individual tracks uploaded to a website. Below in this post, are examples of each song, screenshots of the processing done, as well as a short explanation of my reasoning for each song’s processing chain.
Pre-mastering
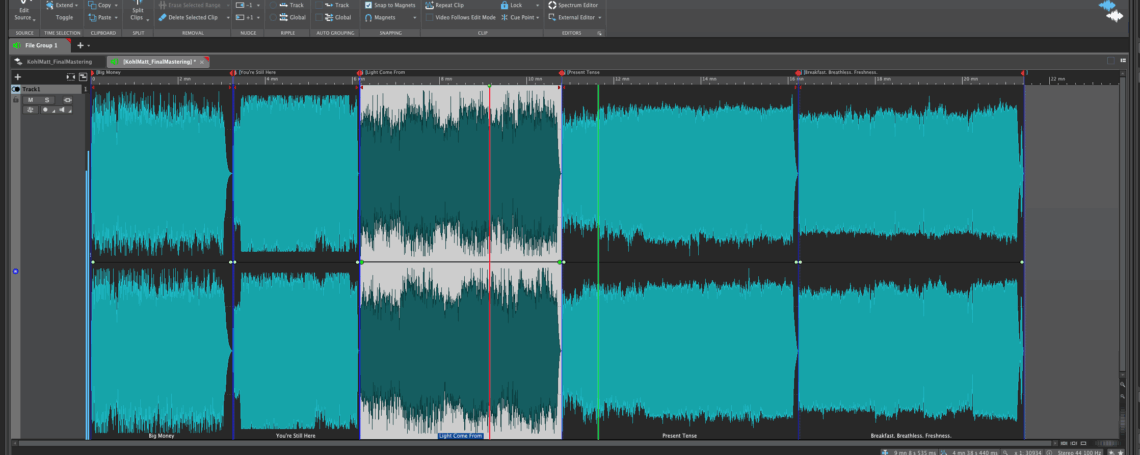
First things first, I had to decide which 5 out of the 9 pre-mixed songs I wanted to use in the project. That’s a pretty simple process, just putting them on the timeline and listening through. After that, before any processing, I used the meta-normalizer to normalize them all to the loudest song in the track using the pre-effects clip gain. Then I topped and tailed each with about 200ms on the top and however long was needed on the tail, then adjusted them such that the transitions between each track felt natural.
Big Money
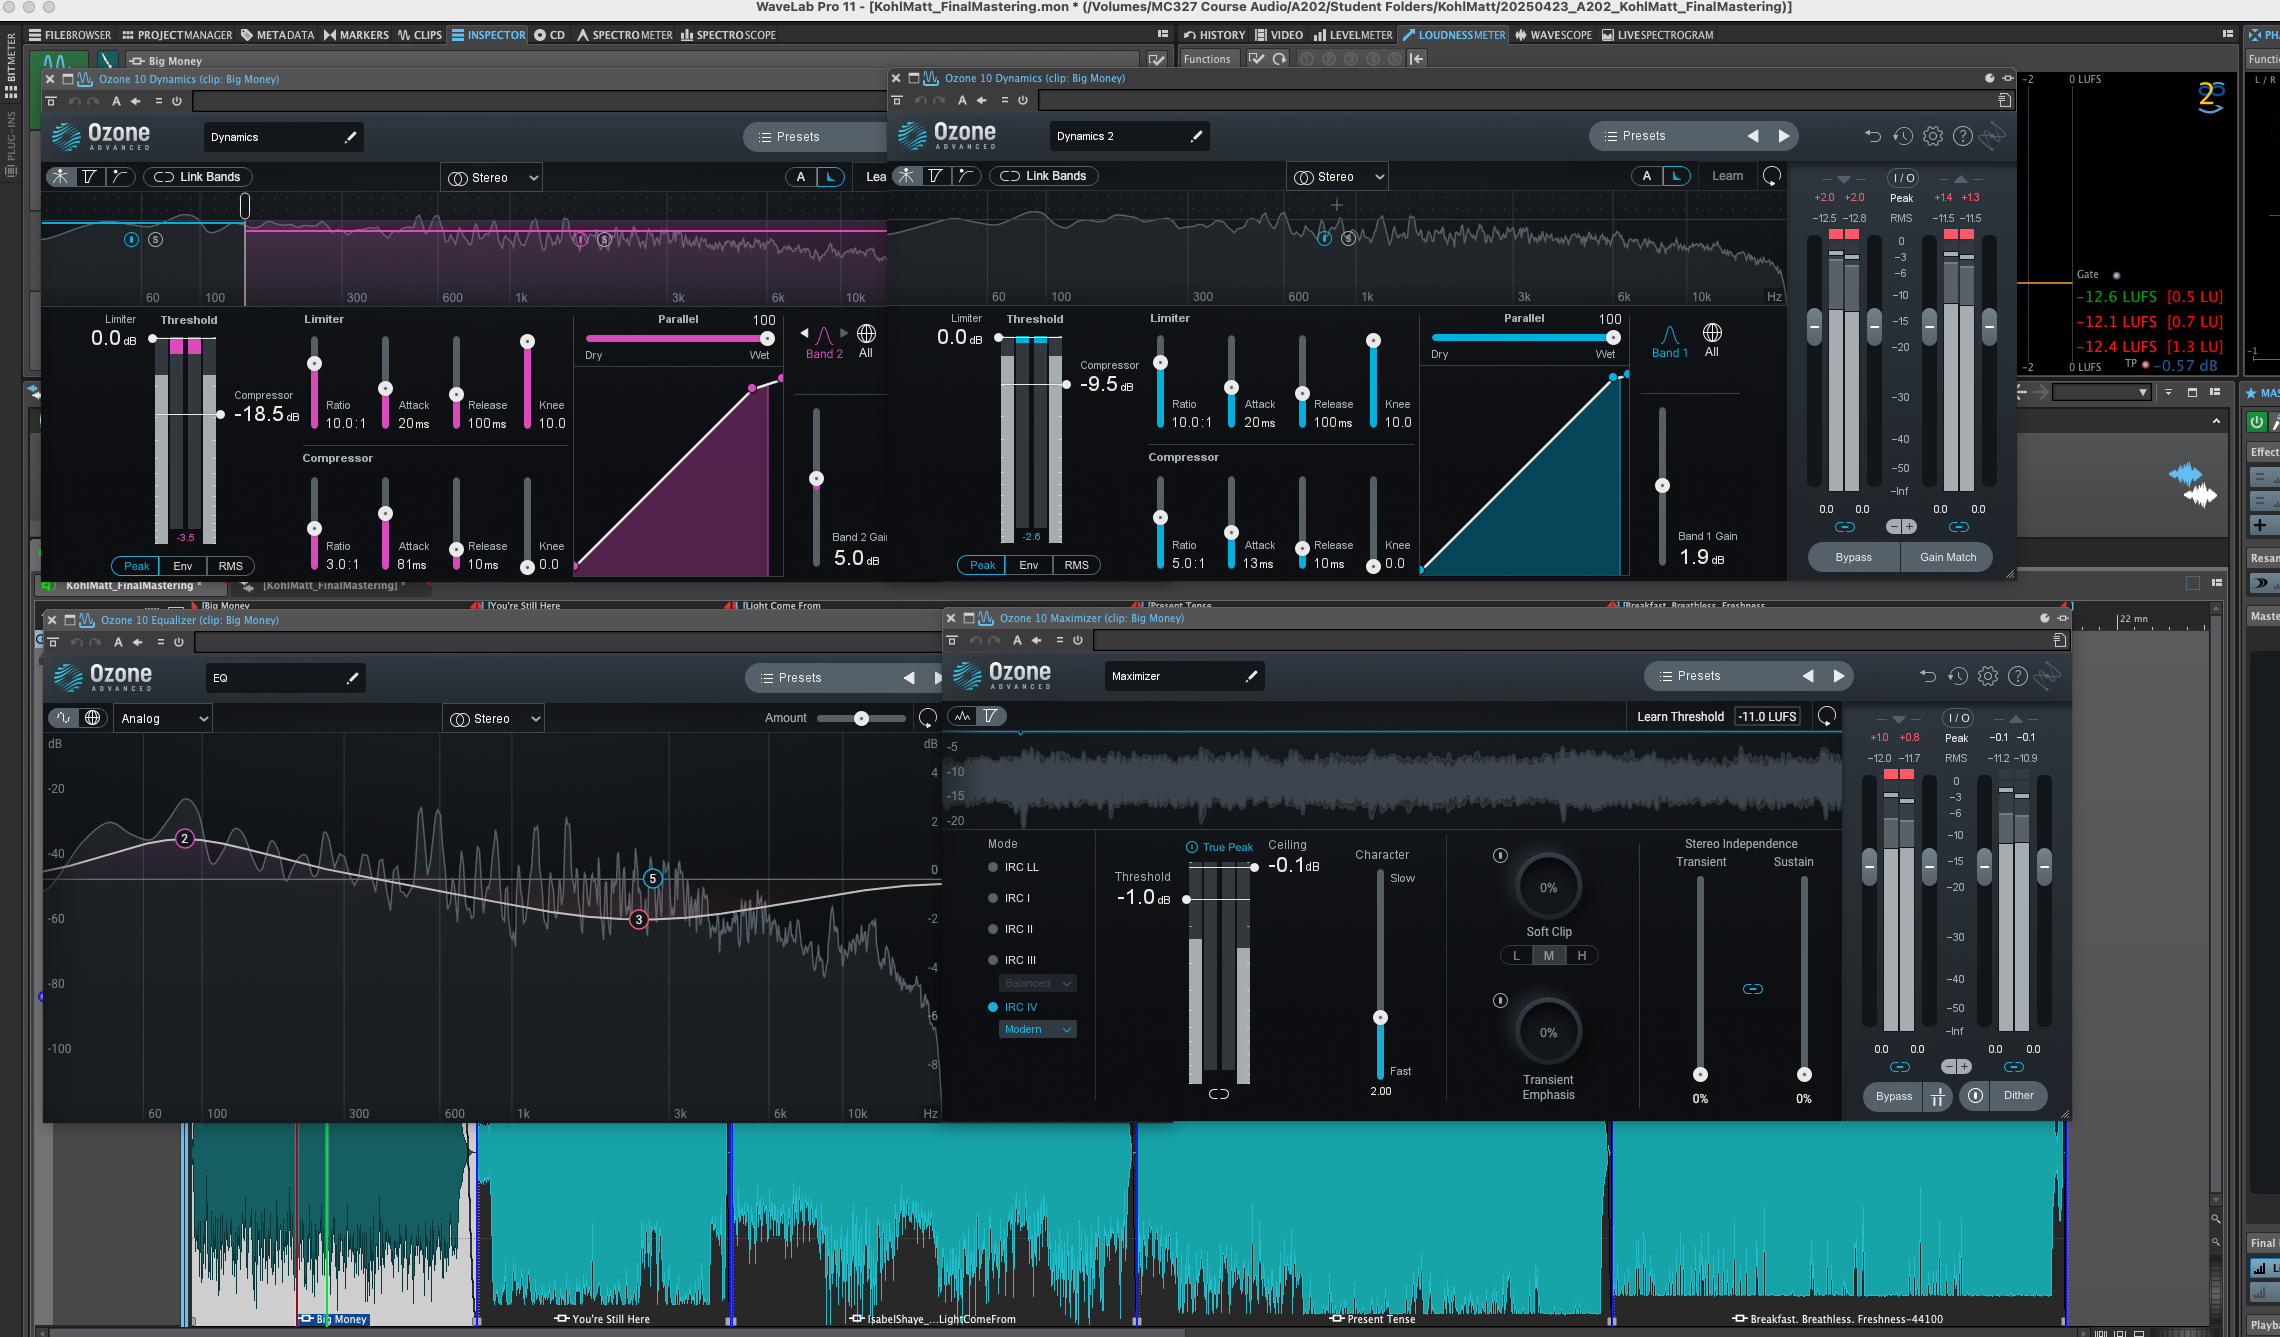
The first thing I felt like I wanted out of this song was more punch from the bass, so I started off with multi-band compressor to target that bass with more compression than the rest. After that, I followed it with a broadband compressor as just another loudness stage to bring the overall level closer to my (rough) target LUFS of -12.5. Then some tonal shaping: I brought the lows up a bit to also help bring the bass out a bit and then a scoop in the hi-mids to clear up some density in that area. Finally, I finished it off with a limiter set in true peak to bring it up to the target loudness level without clipping in the analog domain.
You’re Still Here
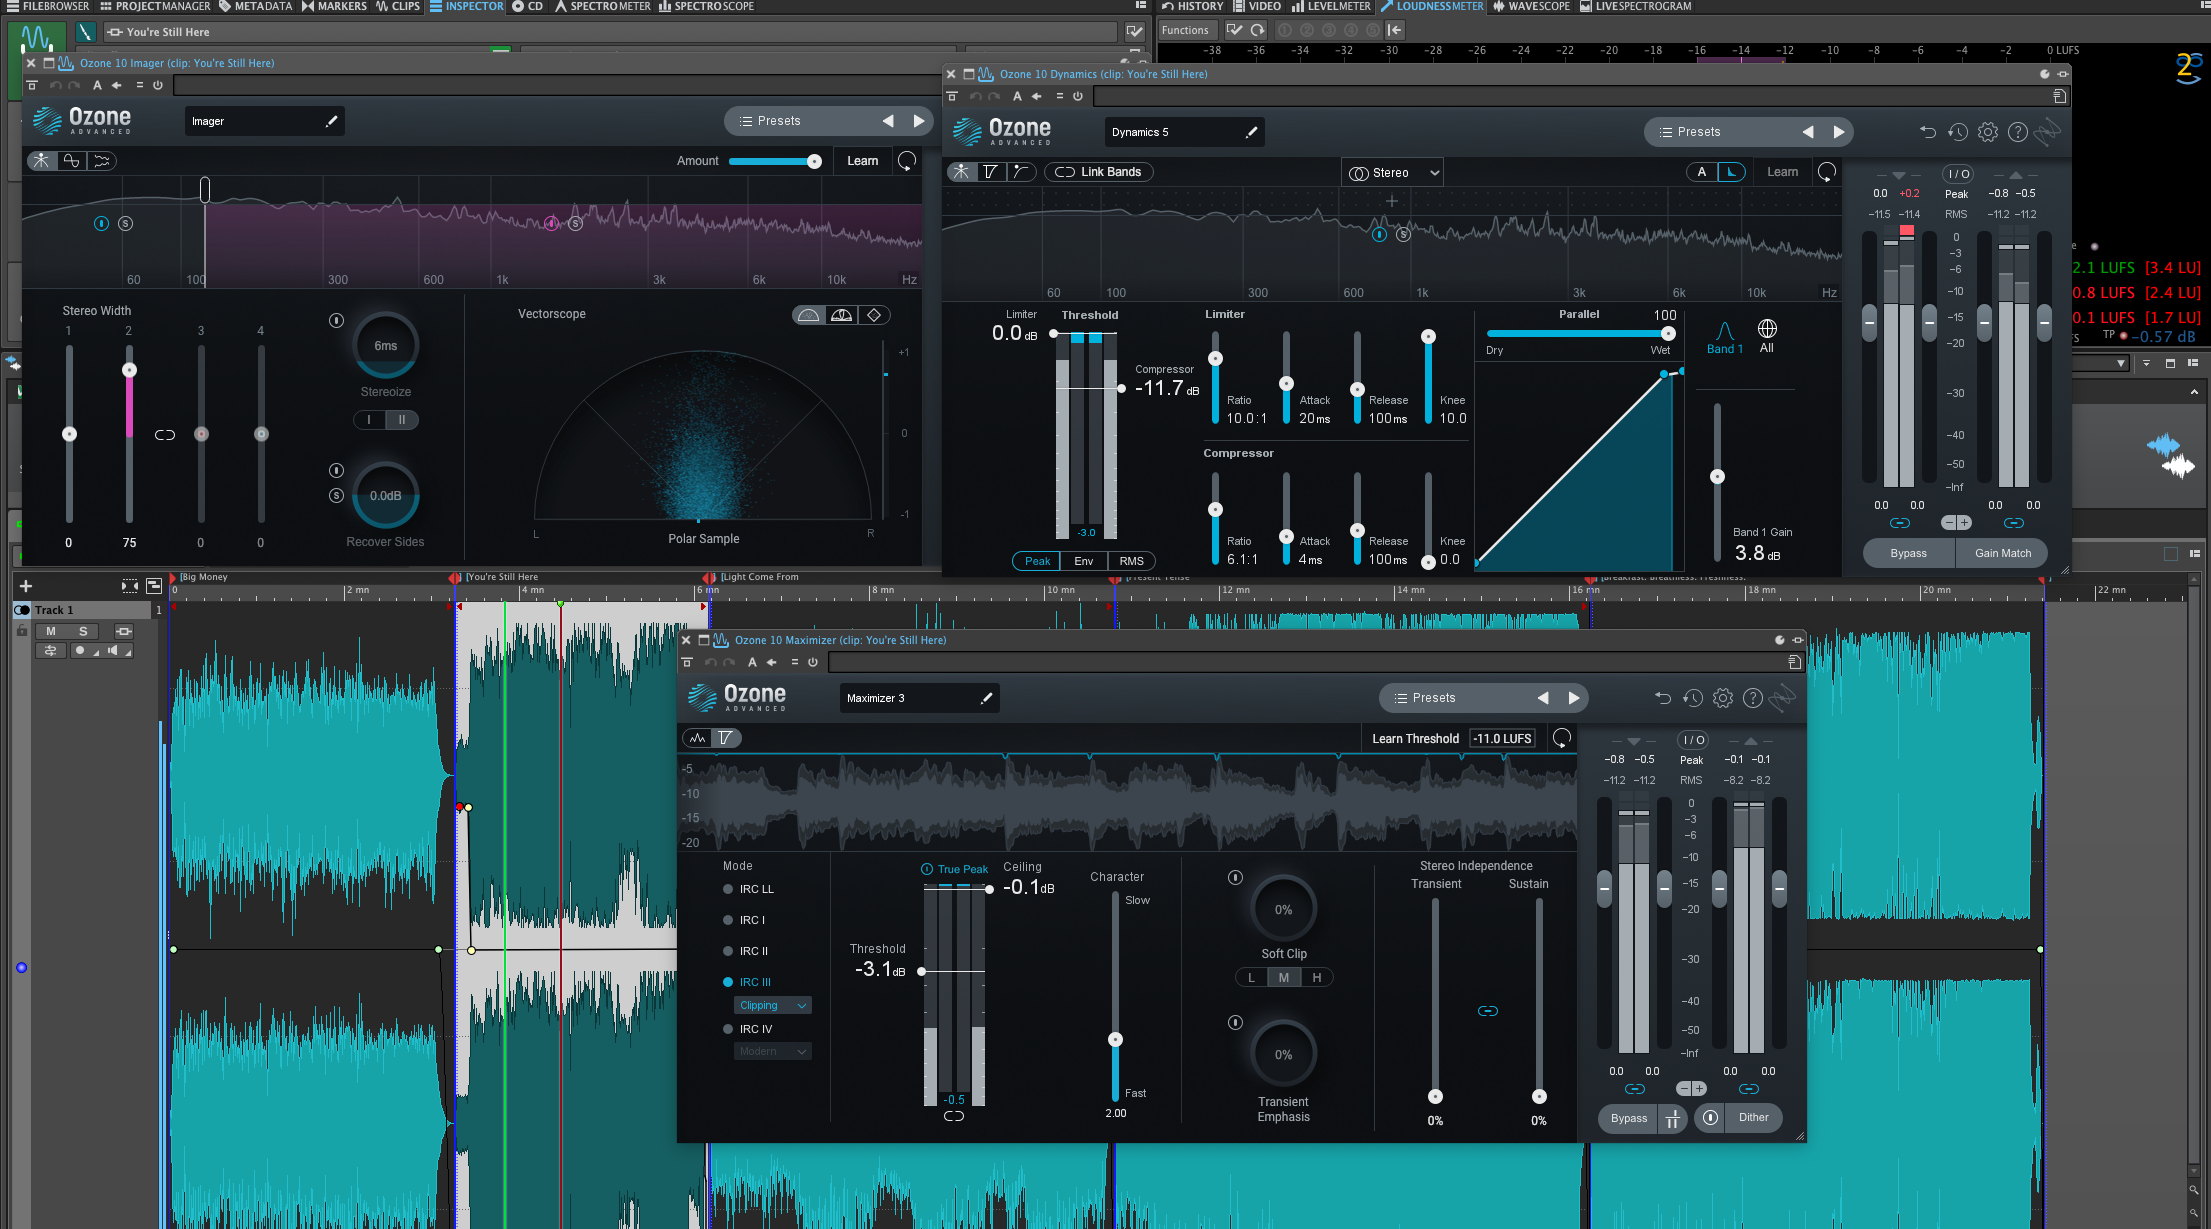
One of the biggest things I noticed when first listening to this song was just how narrow the stereo field was. So first off, I hit it with an Ozone Imager to widen out the image without spreading the bass too much. Then with some aggressive compression to bring it up to level and add some more bite. Finally, a limiter at the end of the chain for some more punch and final push to target LUFS.
Light Come From

This one was a much different style than some of the other songs, so it was a bit more of a challenge to get it to fit in better. I started it off with some light peak reduction compression as the first stage, followed by some EQ to clean up some muddiness in the low-end and some mid boost to bring the vocals out a bit. After that I used another compressor with a bit of slower attack to bring up the body a bit more before going into the limiter at the end for the final stage of loudness.
Present Tense
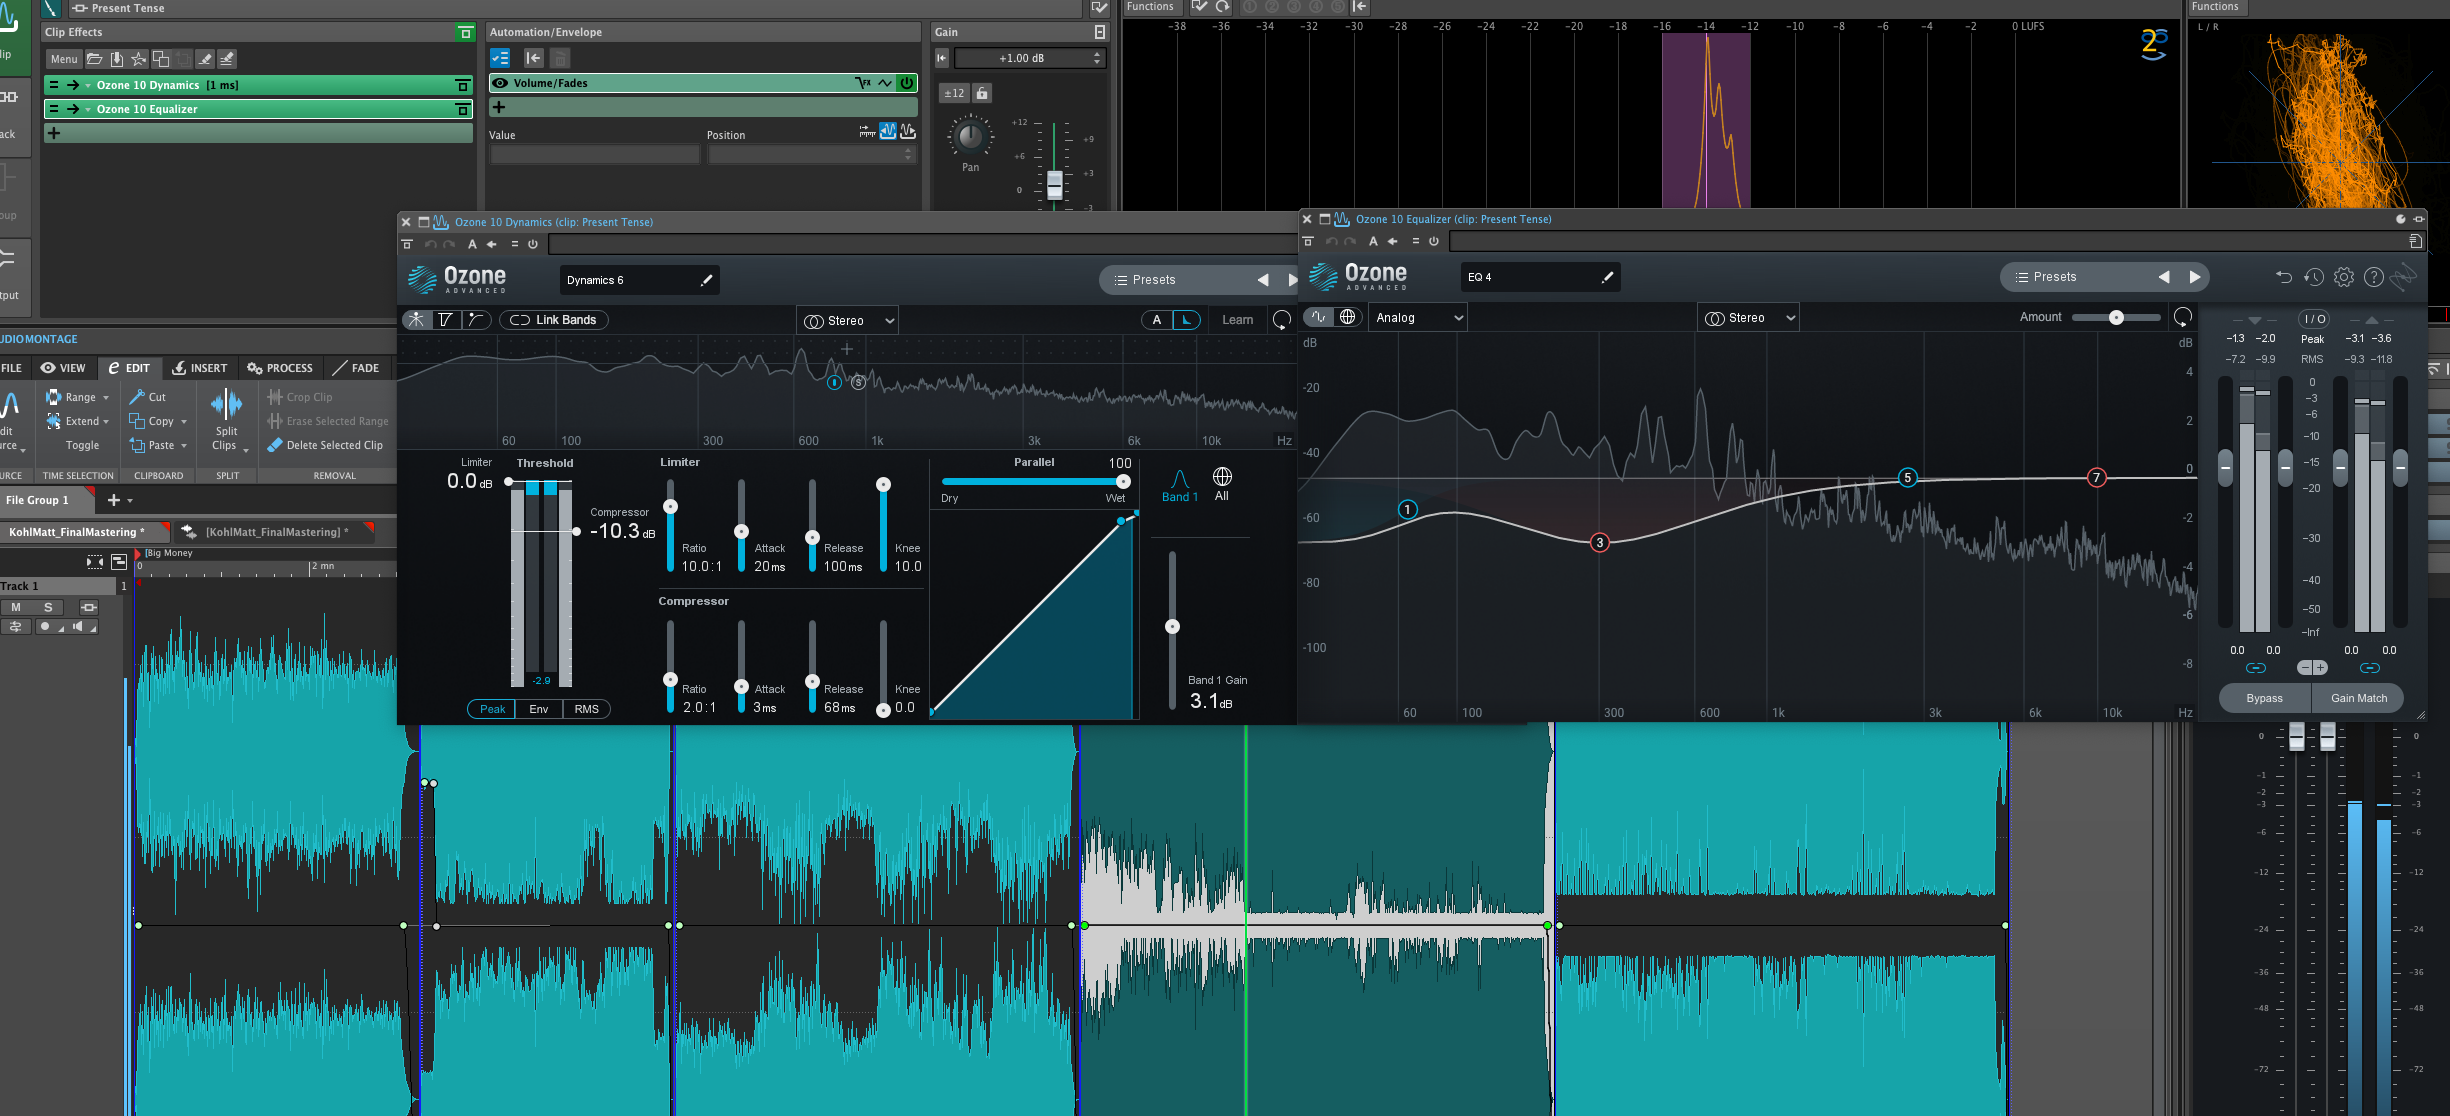
I didn’t feel like this one needed much considering it was already limited pretty heavily when I started work on it. I really just hit with a low ratio, short attack compressor to take the edge off of the peaks and followed that with a cut in the low and low-mids to clear up some mud. I didn’t end up using a limiter at the end of the chain since it was already pretty limited, and there ended up being a limiter on the master to prevent clipping.
Breakfast. Breathless. Freshness.
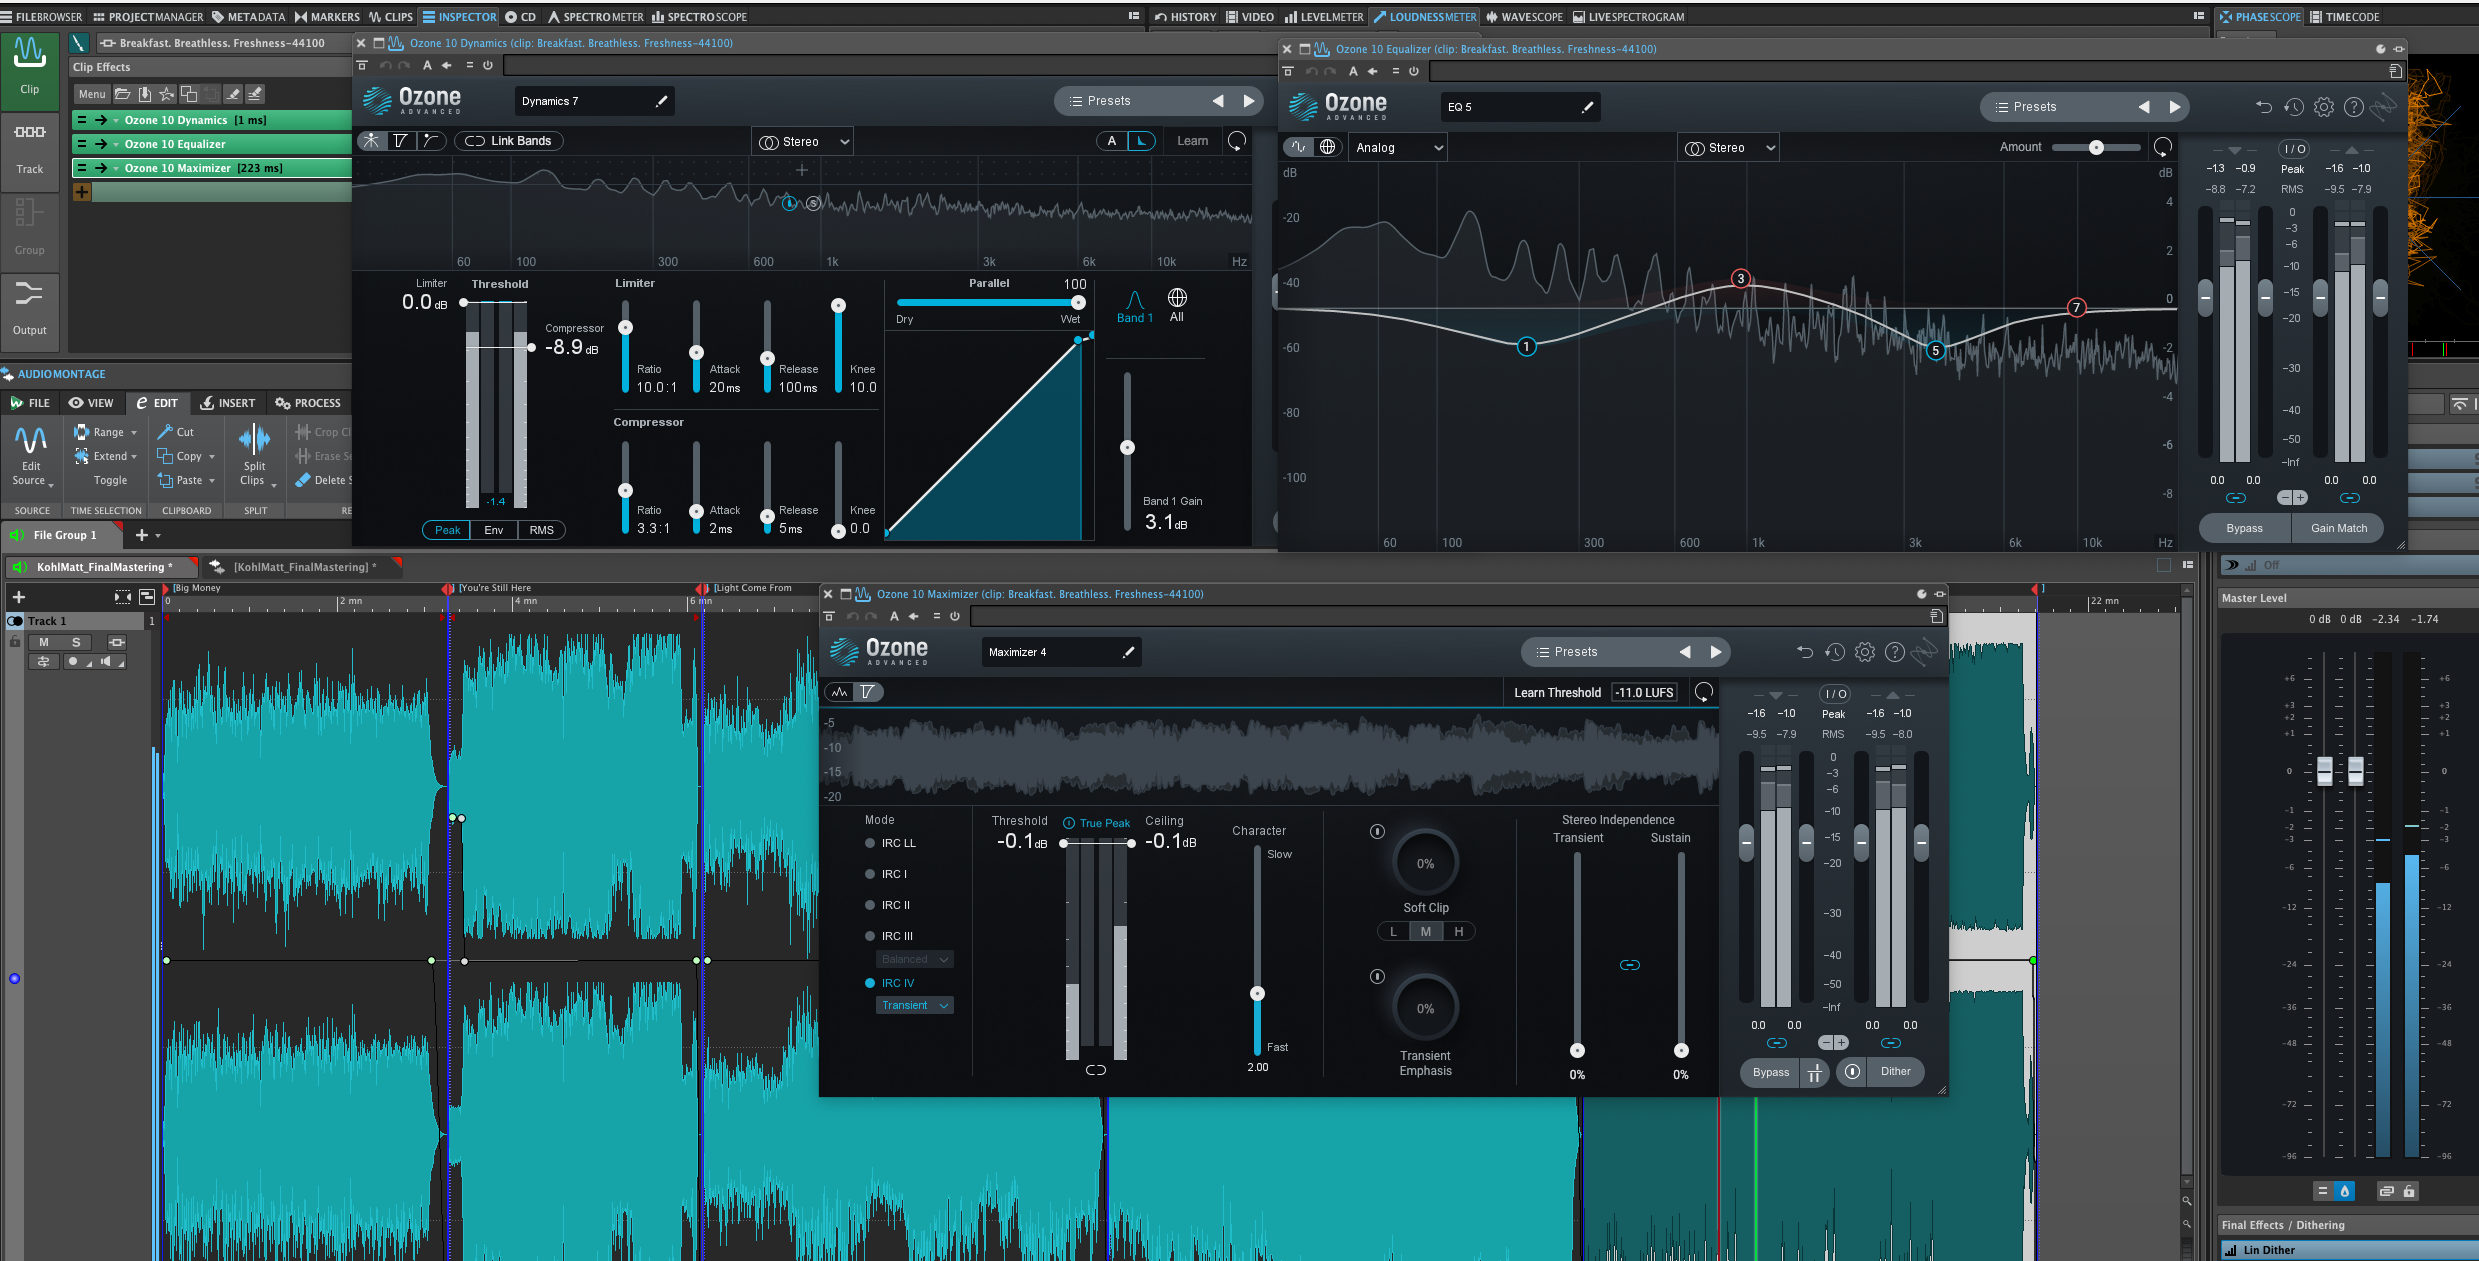
This one was also pretty heavily limited already like the one before it, but I also noticed some harshness in it. So I started off with a compressor to cut the transients a smidge, and ended up bringing down 4k in the EQ as well. Beyond that, I also was noticing some low end build up around 250, so I cut that while raising some mid bring out the vocals a bit. Finally, I just noticed some clipping, but I was at the target loudness. So, I set up the limiter to just catch the peaks that would go past the ceiling, but not really raise the level otherwise.
CD Master Assembly
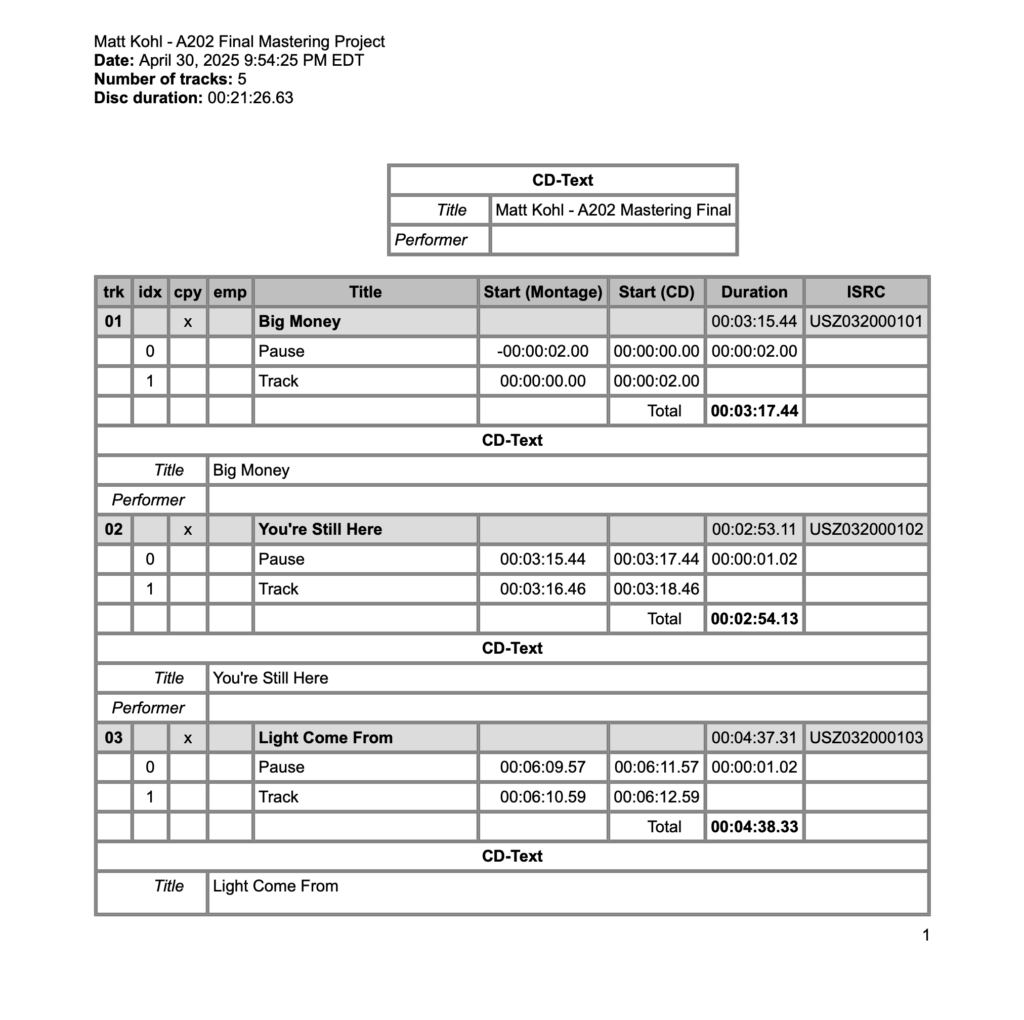
After all processing was complete, it was time to assemble the CD master. This just involved creating the CD markers as seen in the pictures, adding in the ISRC codes and CD-Text for each track, generating a PQ log, adding dither, and finally, burning to a DDP file! After that, I imported it back in and listened through for confidence check, and then it’s ready to be sent off to the processing plant (aka Konrad).